Areas of Interest, as counted by my cat

Category: VirtualBox

Bi-directional Host-only networking with Virtualbox

I thought I already had a post about this, but I can’t find it, so where we go again.

It has been a while since I set up a guest OS and configured it for networking between Host and Guest. Of course, we also want the Guest to be able to see the Internet…

Environment:

  • Host OS : Windows 10
  • Guest OS: Linux Mint

Important Configuration Steps:

  1. The Host Virtualbox need host-only networking enabled
  2. The Guest OS needs a second network adaptor enabled, for host-only networking
  3. The Guest OS needs MANUAL IP configuration
  4. The Host OS needs a Firewall adjustment

1. Enable Host-Only networking in Virtualbox

Under Global Tools, or File > Host Networking Manager, or Ctrl-W:

image

I use the default base address range of 192.168.56.x and the host IP of .1.

I also set up the DHCP server to dispatch addresses in the 101-254 range.

2. Add a second adaptor to the Guest OS

By default the network adaptor in the Guest is NAT. We want to leave this one unchanged, and click on the Adapter 2 tab:

image

Enable the adapter and select “Host-only adapter”.

3. Manually configure the Guest OS IP settings on the new adaptor

At this point we should be able to ping the host:

colin@golem:~$ ping 192.168.56.1
PING 192.168.56.1 (192.168.56.1) 56(84) bytes of data.
64 bytes from 192.168.56.1: icmp_seq=1 ttl=128 time=0.254 ms
64 bytes from 192.168.56.1: icmp_seq=2 ttl=128 time=0.762 ms
64 bytes from 192.168.56.1: icmp_seq=3 ttl=128 time=0.655 ms
^C
--- 192.168.56.1 ping statistics ---
3 packets transmitted, 3 received, 0% packet loss, time 2047ms
rtt min/avg/max/mdev = 0.254/0.557/0.762/0.218 ms

And, indeed we can. Even though the network will be available, the adaptor will probably have obtained an IP from the DHCP server, e.g. 192.168.56.101.

Go to the Network Connections dialog and edit the settings on the second network connection. (I usually rename my Ethernet connections so as to clearly identify which is WAN and which is LAN):

image

For the “Host Network” adaptor, under IPV4 Settings, configure a manual static IP address.

I use 192.168.56.56 because it is easy to remember.

image

At this point, you may need to restart the networking subsystem to respect your changes. I usually just log out and re-login to the Guest desktop at this point.

Check the IP settings using ifconfig :

colin@golem:~$ ifconfig
enp0s3: flags=4163<UP,BROADCAST,RUNNING,MULTICAST> mtu 1500
inet 10.0.2.15 netmask 255.255.255.0 broadcast 10.0.2.255
...

enp0s8: flags=4163<UP,BROADCAST,RUNNING,MULTICAST> mtu 1500
inet 192.168.56.56 netmask 255.255.255.0 broadcast 192.168.56.255
...

Good, looks like it is respecting the static IP we want.

At this point, in the Host OS, try pinging 192.168.56.56. It might work fine… in which case you can stop here. But if you encounter problems communicating with the Guest, you may need to relax the Host firewall:

4. Adjust the Host’s firewall

Seeing as this network only exists virtually on my computer, I want to take the simple way out and just tell my host firewall to get out of the way of this specific network.

In Windows 10, bring up the Windows Defender Firewall and select “Advanced Settings” from the left panel.

image

Select “Windows Defender Firewall Properties”

Select Private Profile and Public Profile tabs, and select “Customize”

Uncheck “VirtualBox Host-Only Network”

At this point, you should be able to communicate between Host and Guest in either direction, using any protocol you want.

Virtuabox Host Networking revisited

My current work environment consists of a Windows 10 host running Virtualbox 5.2 with a Windows 7 guest VM,in which I run my client development tools.

I had Virtualbox Host Networking set up on the default 192.168.56.x subnet, but the second adapter in the guest wasn’t configured because at the time I had no need to “see” the host resources from the guest.

Until now… I find that I needed to point some client tools on the guest VM at the SQL Server instance running on the host.

Okay, no problem, just set up the second adaptor on the guest as 192.168.56.56, set the gateway as 56.1, and it should all work, right?

image

Yeah, well, for some reason it did not work. I could PING the guest from the host side, but the host was not responding to pings from the guest.

Temporarily disabling the Windows Firewall on the host allowed the guest to “see” the host. So it was a Windows 10 host firewall configuration issue.

I found this post that explains how best to address this problem:

https://superuser.com/questions/936581/how-to-config-windows-firewall-so-vm-host-only-can-ping-windows-7

Essentially:

  • Open Windows Firewall
  • Scroll the right-hand pane down until you see “Windows Firewall Properties”
  • Click on it
  • Select Public Profile
  • Click on “Customize”
  • un-check the “Virtualbox Host Only Network”

image

This will disable Windows Firewall from getting in the way of networking between the host and guest.

Thanks, Andrew Joe!

Installing VirtualBox 4.3 on Windows 7-64 – Solved

I was preparing for an Oracle online workshop on Database 12c multi-tenancy, and as part of the prep, you get to download a VM image with the lab environment. Of course, being Oracle, it is a Virtual Box vm.

Now, I like Virtual Box. It works great on my Mac at home, but for some reason I’ve had problems installing 4.x on my work laptop (Lenovo W520, getting on a bit now but still recommended).

The problem is Virtual Box almost completely installs – until it gets a certain point, then the progress bar runs backwards and it says “rolling back install”, followed by:

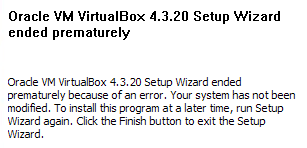
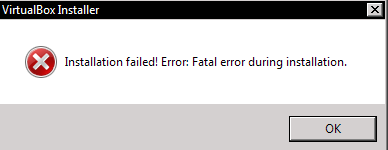
“Oracle VM VirtualBox 4.3.20 Setup Wizard ended prematurely” because of “an error”. This is followed up by “Installation failed! Fatal error during installation.”.

No other information provided. Running as Adminstrator after a cold reboot didn’t help.

Well… I really wanted to have the Workshop lab environment available, so despite the fact that last time I encountered this problem I didn’t find any useful help on the web, I tried again… and this time, I found something on the forums, a post by user Tronmech:

https://forums.virtualbox.org/viewtopic.php?f=6&t=61785

I’ll repeat the instructions here in case for some reason that post vanishes:

  • Go into the registry at: HKEY_LOCAL_MACHINE\SYSTEM\ControlSet001\Control\Network
  • Change “MaxNumFilters” from 8 to 20 (decimal)
  • Reboot
  • Install 4.3.x (run installer as administrator, just in case)

This time, the install was successful. Thanks, Tronmech!

After some more research, it seems that Windows 7 has a maximum hard-coded limit of 14 network filter drivers… and for some reason, this setting in the registry reduces it further to 8, by default.

So setting the MaxNumFilters key to 20 probably only lifts the artificial limit and allows 14 possible filters. Applications such as Virtual Machine managers and VPN clients need to add filters to the network stack, and increasing this limit in the registry seems to be the recommended fix.

In one KB article, I read that a Windows Service Pack could not be installed until some filters were removed!

To view currently deployed Network Filter Drivers, right-click on your connection widget in the Network Connections control panel applet, and view properties:

I believe that each of those checkboxed items is a “Network Filter Driver”. I have 9 of them, and I assume that the “VirtualBox Bridged Networking” driver was the 9th one added after I lifted the limit of 8.

© 2025 More Than Four

Theme by Anders NorenUp ↑